Summary
There is an open source project from JetStack called kube-lego. It allows you to automatically request SSL certificates for your Kubernetes cluster using Let’s Encrypt free service. Working with Let’s Encrypt using Kube-lego is quite straightforward. Nginx Ingress Controller has built-in support for kube-lego. Having RBAC might seem like a complication but in fact it doesn’t add much of a complexity to the solution.
Requirements
- Kubernetes 1.8.0 or higher with Nginx Ingress Controller deployed
- 30 minutes of spare time
Description
Let’s Encrypt is a service that provides you with automatic TLS/SSL certificate provisioning for your website. If you have hobby cluster at home, just as I do, this solution is perfect for you. Let’s Encrypt is a free and automated way for your Kubernetes cluster to issue and assign SSL certificates to ingress resources in your Kubernetes Cluster.
Step 1. Create kube-lego deployment, RBAC Roles and ConfigMap
Get the yaml file below, replace you@email.com with your email and apply it to your cluster. This will create kube-lego namespace with all components required, including RBAC resources. This configuration uses staging environment of Let’s encrypt. After we have tested the staging configuration we will delete issued secrets and change the configmap to poi nt to production Let’s Encrypt API.
Let’s save the file below and run
kubectl apply -f kube-lego.yaml
apiVersion: v1
kind: Namespace
metadata:
name: kube-lego
---
apiVersion: v1
metadata:
name: kube-lego
namespace: kube-lego
data:
# modify this to specify your address
lego.email: "your@email.com"
# configure letencrypt's production api
#lego.url: "https://acme-v01.api.letsencrypt.org/directory"
# configure letencrypt's staging api
lego.url: "https://acme-staging.api.letsencrypt.org/directory"
kind: ConfigMap
---
apiVersion: rbac.authorization.k8s.io/v1beta1
kind: ClusterRole
metadata:
name: lego
rules:
- apiGroups:
- ""
- "extensions"
resources:
- configmaps
- secrets
- endpoints
- ingresses
- nodes
- pods
verbs:
- list
- get
- watch
- apiGroups:
- "extensions"
- ""
resources:
- ingresses
- ingresses/status
verbs:
- get
- update
- create
- list
- patch
- delete
- watch
- apiGroups:
- "*"
- ""
resources:
- events
- certificates
- secrets
- services
verbs:
- create
- list
- update
- get
- patch
- watch
---
apiVersion: rbac.authorization.k8s.io/v1beta1
kind: ClusterRoleBinding
metadata:
name: lego
roleRef:
apiGroup: rbac.authorization.k8s.io
kind: ClusterRole
name: lego
subjects:
- kind: ServiceAccount
name: lego
namespace: kube-lego
---
apiVersion: v1
kind: ServiceAccount
metadata:
name: lego
namespace: kube-lego
---
apiVersion: extensions/v1beta1
kind: Deployment
metadata:
name: kube-lego
namespace: kube-lego
spec:
replicas: 1
template:
metadata:
labels:
app: kube-lego
spec:
serviceAccountName: lego
containers:
- name: kube-lego
image: jetstack/kube-lego:0.1.5
imagePullPolicy: Always
ports:
- containerPort: 8080
env:
- name: LEGO_EMAIL
valueFrom:
configMapKeyRef:
name: kube-lego
key: lego.email
- name: LEGO_URL
valueFrom:
configMapKeyRef:
name: kube-lego
key: lego.url
- name: LEGO_NAMESPACE
valueFrom:
fieldRef:
fieldPath: metadata.namespace
- name: LEGO_POD_IP
valueFrom:
fieldRef:
fieldPath: status.podIP
- name: LEGO_LOG_LEVEL
value: debug
readinessProbe:
httpGet:
path: /healthz
port: 8080
initialDelaySeconds: 5
timeoutSeconds: 1
Step 2. Create an ingress resource to test SSL provisioning
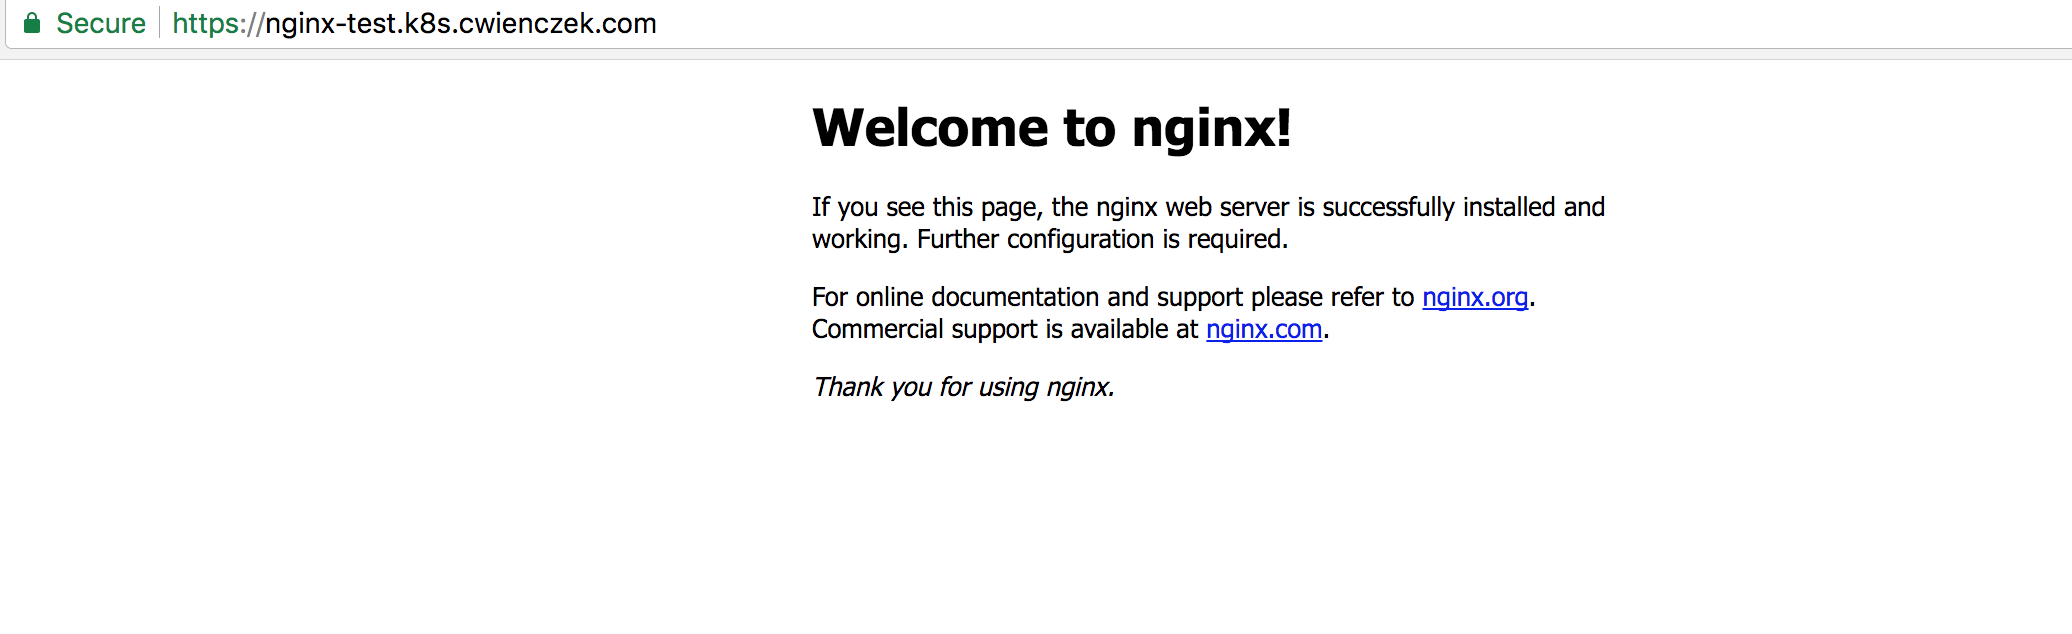
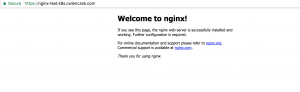
Let’s create simple nginx service and see if we can get a green lock in browser after creating an ingress. Remember that ingress must have tls.acme annotation as shown below in order for kube-lego to work!
Create the resources below in your Kubernetes cluster.
apiVersion: apps/v1beta2 # for versions before 1.8.0 use apps/v1beta1
kind: Deployment
metadata:
name: nginx-deployment
spec:
selector:
matchLabels:
app: nginx
replicas: 1
template:
metadata:
labels:
app: nginx
spec:
containers:
- name: nginx
image: nginx:1.7.9
ports:
- containerPort: 80
---
kind: Service
apiVersion: v1
metadata:
name: nginx-service
spec:
selector:
app: nginx
ports:
- protocol: TCP
port: 80
targetPort: 80
---
apiVersion: extensions/v1beta1
kind: Ingress
metadata:
name: nginx-ingress
annotations:
kubernetes.io/tls-acme: "true"
ingress.kubernetes.io/ssl-redirect: "true"
spec:
tls:
- hosts:
- nginx-test.cwienczek.com
secretName: nginx-ingress-tls
rules:
- host: nginx-test.cwienczek.com
http:
paths:
- path: /
backend:
serviceName: nginx-service
servicePort: 80
After a few minutes, let’s do curl on the resource:
curl -i -k --verbose https://nginx-test.cwienczek.com
If kube-lego works, you will get something like:
* Rebuilt URL to: https://nginx-test.cwienczek.com/
* Trying 77.173.237.136...
* TCP_NODELAY set
* Connected to nginx-test.cwienczek.com (77.173.237.136) port 443 (#0)
* ALPN, offering h2
* ALPN, offering http/1.1
* Cipher selection: ALL:!EXPORT:!EXPORT40:!EXPORT56:!aNULL:!LOW:!RC4:@STRENGTH
* successfully set certificate verify locations:
* CAfile: /etc/ssl/cert.pem
CApath: none
* TLSv1.2 (OUT), TLS handshake, Client hello (1):
* TLSv1.2 (IN), TLS handshake, Server hello (2):
* TLSv1.2 (IN), TLS handshake, Certificate (11):
* TLSv1.2 (IN), TLS handshake, Server key exchange (12):
* TLSv1.2 (IN), TLS handshake, Server finished (14):
* TLSv1.2 (OUT), TLS handshake, Client key exchange (16):
* TLSv1.2 (OUT), TLS change cipher, Client hello (1):
* TLSv1.2 (OUT), TLS handshake, Finished (20):
* TLSv1.2 (IN), TLS change cipher, Client hello (1):
* TLSv1.2 (IN), TLS handshake, Finished (20):
* SSL connection using TLSv1.2 / ECDHE-RSA-AES128-GCM-SHA256
* ALPN, server accepted to use h2
* Server certificate:
* subject: CN=nginx-test.cwienczek.com
* start date: Dec 11 18:57:19 2017 GMT
* expire date: Mar 11 18:57:19 2018 GMT
* issuer: CN=Fake LE Intermediate X1
* SSL certificate verify result: unable to get local issuer certificate (20), continuing anyway.
* Using HTTP2, server supports multi-use
* Connection state changed (HTTP/2 confirmed)
* Copying HTTP/2 data in stream buffer to connection buffer after upgrade: len=0
* Using Stream ID: 1 (easy handle 0x7f975380a400)
> GET / HTTP/2
> Host: nginx-test.cwienczek.com
> User-Agent: curl/7.54.0
> Accept: */*
>
* Connection state changed (MAX_CONCURRENT_STREAMS updated)!
< HTTP/2 200 ``` The most important part is about TLS, as you can see the isuer is `issuer: CN=Fake LE Intermediate X1`. This means that kube-lego has successfully fetched staging (fake) TLS certificate into our cluster. If you see `issuer: O=Acme Co; CN=Kubernetes Ingress Controller Fake Certificate` instead, this means Kube-lego has not been able to pull certificate. Check logs of kube-lego pod if that happens. # Step 3. Configure kube-lego to use production environment After we have tested that kube-lego works, we can switch it to use production environment of Let's Encrypt. Change the configmap of the previous kube-lego.yaml from ``` apiVersion: v1 metadata: name: kube-lego namespace: kube-lego data: # modify this to specify your address lego.email: "your@email.com" # configure letencrypt's production api #lego.url: "https://acme-v01.api.letsencrypt.org/directory" # configure letencrypt's staging api lego.url: "https://acme-staging.api.letsencrypt.org/directory" kind: ConfigMap ``` to ``` apiVersion: v1 metadata: name: kube-lego namespace: kube-lego data: # modify this to specify your address lego.email: "your@email.com" # configure letencrypt's production api lego.url: "https://acme-v01.api.letsencrypt.org/directory" # configure letencrypt's staging api #lego.url: "https://acme-staging.api.letsencrypt.org/directory" kind: ConfigMap ``` And invoke the commands below (source: https://github.com/jetstack/kube-lego/issues/21): ``` kubectl delete deployment --namespace kube-lego kube-lego kubectl --namespace=kube-lego delete secret kube-lego-account kubectl delete secret nginx-ingress-tls --namespace default ``` and re-deploy kube-lego with changed configmap: ``` kubectl apply -f kube-lego.yaml ``` # Step 4. Verify that real certificate has been issued It can take up to a few minutes to issue the new certificate. After that time, let's run ``` curl -i -k --verbose https://nginx-test.cwienczek.com ``` The result this time should be: ``` * Rebuilt URL to: https://nginx-test.cwienczek.com/ * Trying 77.173.237.136... * TCP_NODELAY set * Connected to nginx-test.cwienczek.com (77.173.237.136) port 443 (#0) * ALPN, offering h2 * ALPN, offering http/1.1 * Cipher selection: ALL:!EXPORT:!EXPORT40:!EXPORT56:!aNULL:!LOW:!RC4:@STRENGTH * successfully set certificate verify locations: * CAfile: /etc/ssl/cert.pem CApath: none * TLSv1.2 (OUT), TLS handshake, Client hello (1): * TLSv1.2 (IN), TLS handshake, Server hello (2): * TLSv1.2 (IN), TLS handshake, Certificate (11): * TLSv1.2 (IN), TLS handshake, Server key exchange (12): * TLSv1.2 (IN), TLS handshake, Server finished (14): * TLSv1.2 (OUT), TLS handshake, Client key exchange (16): * TLSv1.2 (OUT), TLS change cipher, Client hello (1): * TLSv1.2 (OUT), TLS handshake, Finished (20): * TLSv1.2 (IN), TLS change cipher, Client hello (1): * TLSv1.2 (IN), TLS handshake, Finished (20): * SSL connection using TLSv1.2 / ECDHE-RSA-AES128-GCM-SHA256 * ALPN, server accepted to use h2 * Server certificate: * subject: CN=nginx-test.cwienczek.com * start date: Dec 11 19:06:15 2017 GMT * expire date: Mar 11 19:06:15 2018 GMT * issuer: C=US; O=Let's Encrypt; CN=Let's Encrypt Authority X3 * SSL certificate verify ok. * Using HTTP2, server supports multi-use * Connection state changed (HTTP/2 confirmed) * Copying HTTP/2 data in stream buffer to connection buffer after upgrade: len=0 * Using Stream ID: 1 (easy handle 0x7f94b880a400) > GET / HTTP/2
> Host: nginx-test.cwienczek.com
> User-Agent: curl/7.54.0
> Accept: */*
>
* Connection state changed (MAX_CONCURRENT_STREAMS updated)!
< HTTP/2 200
Which says that the issuer this time is Let’s Encrypt indeed:
issuer: C=US; O=Let's Encrypt; CN=Let's Encrypt Authority X3
Now you can also go to the web browser and verify that you get a green lock when browsing to the URL: